CELEBRATION DETAILS
Abien Party Accessories & Decoration Ideas
Connect a celebration look with a few well-chosen details around it.
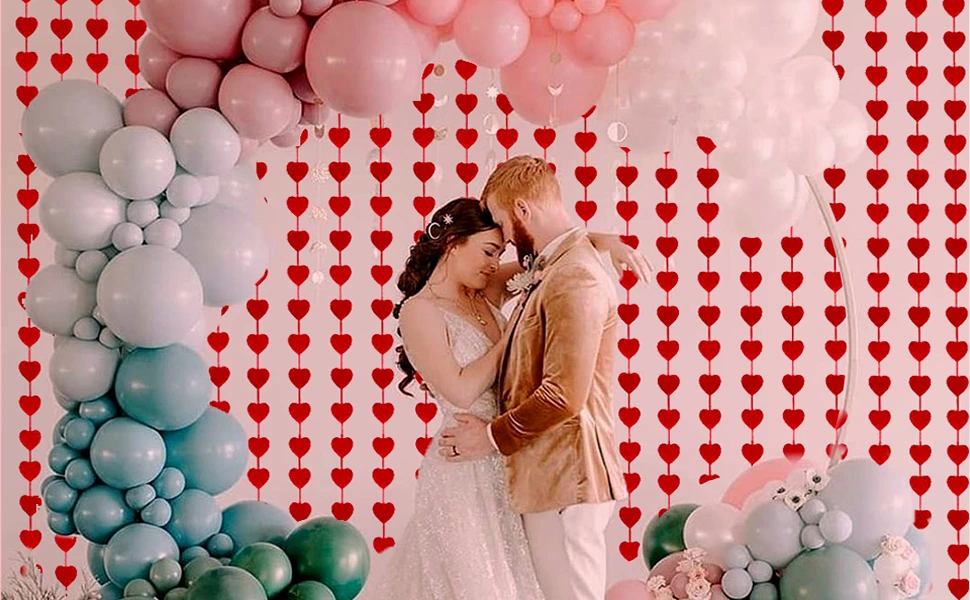
A party can feel visually connected without turning the room and every outfit into a matching set. Often, the most effective starting point is one idea: a color, a motif or a finish that appears in a few well-chosen places. The challenge is deciding where that idea will be most visible, what the space can accommodate and which details will actually help people enjoy the occasion.
This guide brings those decisions together. You will plan the space, compare decoration quantities, choose an outfit focal point, test a photo area and organize setup and packing. Abien’s party decorations, headpieces and costume accessories provide possible ingredients. Your room, guest plans and existing belongings determine how to combine them. The measurements below are planning examples, not specifications for any particular product.
1. Write a simple plan before browsing
Start with three practical questions: where will people gather, what will they do, and which part of the event do you want to emphasize? A seated birthday meal needs different space from a dance-focused gathering. A small photo corner may be enough decoration for one event, while another has a table or doorway that naturally becomes the focal point.
Write a sentence that combines the occasion and the visual direction. For example: a small evening birthday with silver details and a simple photo backdrop. This gives you a way to assess new ideas. If an item does not help the plan, it can remain an option for another occasion rather than becoming one more thing to install.
Next, list what you already have: plain clothing, suitable furniture, a neutral wall, reusable containers or accessories from a previous celebration. Beginning with these items helps you identify the actual gaps. It also prevents the common problem of buying several decorative pieces before discovering that the room has no convenient place for them.
2. Choose a palette and one repeating idea
A palette does not have to contain a fixed number of colors. For an easy starting point, choose a main color, a supporting neutral and an optional metallic accent. Then decide which color belongs on the outfit and which belongs in the background. Separating those roles can keep photographs from looking like one uninterrupted block of the same shade.
Choose one motif if you want a stronger theme: hearts, stars, flowers or circles. Repeat it where it will be noticed, not necessarily everywhere. A star detail on a skirt can relate to a star decoration, while a plain top leaves the connection easy to read. Adding unrelated motifs may be fun, but it should be a choice rather than an accidental result of separate purchases.
Look at the room’s existing colors before committing. Curtains, upholstery and wall paint will still appear in the setting. You can work with them or select a small area where they are less dominant. A tightly composed corner is often easier to make coherent than an entire room, especially when setup time is limited.
3. Map the room around people, not just photographs
Sketch the room roughly and mark the places people need to reach: the entrance, seating, food or drinks, and any photo area. You do not need drawing skills or exact scale to notice a potential bottleneck. A beautifully decorated wall is less useful if guests must stand in a doorway to see or photograph it.
Place the gathering zones before the decorations. Allow the host to move between them without continually rearranging objects. Keep hanging pieces and trailing material out of circulation routes, and follow the venue’s requirements for placement and fixing. Ask what surfaces may be used before assuming that tape, hooks or a hanging arrangement will be accepted.
Think about the people attending. A seated photo option, space beside a chair and a clear route through the room can make participation easier. Do not make the only decorated area accessible only by squeezing behind furniture. These are practical planning choices that improve the event without requiring more decoration.
4. Measure before deciding how much to buy
Measure the intended decorated width and height, then compare those numbers with the selected product’s dimensions and package quantity. A photograph can show multiple panels together or include balloons, furniture and props that are not part of the purchase. Read the included-pieces description rather than treating the complete scene as one product.
Width calculations are useful only when you account for the way the panels will be arranged. As an illustration, a 240-centimeter area could take three hypothetical 100-centimeter panels with 20 centimeters of overlap between neighboring panels: 300 minus 40 leaves 260 centimeters of coverage. The extra width may allow adjustment, but it does not determine the correct quantity for a real listing.
Garlands need a different check. The length of a strand is not the same as the width it covers once draped. Plan the intended curve and attachment points before comparing quantities. Record the measurements in one unit and convert carefully if the product page uses another. A note on your phone is enough to avoid relying on memory.
| Planning item | What to record | What to verify |
|---|---|---|
| Backdrop area | Width and height of the usable space | Panel dimensions, overlap and package quantity |
| Hanging garland | Distance between intended attachment points | Strand length, planned drape and supplied pieces |
| Photo position | Where the photographer and guests will stand | Enough visible background for the intended framing |
| Fixing method | Surface type and venue permission | Suitable fixings and the product’s instructions |
5. Test the photo area with a person in it
Before completing the arrangement, take a quick photograph from the position you expect to use. Include someone in the frame, or stand in it yourself using a timer. This shows whether the backdrop actually fills the picture and whether decorations sit awkwardly behind a face or headpiece.
Try a close portrait and a wider outfit photograph. The second view may reveal furniture edges, an unfinished side of the backdrop or objects on the floor. You can move the camera, change the framing or simplify the visible area before adding more panels. More decoration is not always the easiest solution to an unhelpful camera position.
Check the light available at the time of the event. A window that looks pleasant during setup may be dark later, and reflective materials can create bright patches in a photograph. Try the room lights you actually intend to use. Adjust the arrangement until faces and the important outfit details remain visible, without treating a product photograph as a promise of the same result in your space.
6. Give the outfit its own focal point
Choose whether the outfit’s main detail will sit near the face, waist or legs. A headpiece is visible in portraits; a tulle skirt changes the silhouette; fluffy leg warmers add texture lower down. You can combine them, but start with one and then decide which additional piece supports the idea.
If the backdrop is visually busy, try an outfit with some quieter areas. A plain top can separate a detailed headpiece from a patterned skirt. If the clothes already have a strong print, a simpler accessory may be easier to see. These are experiments in contrast, not rules about how expressive a party outfit is allowed to be.
Measure and try the selected pieces before the occasion. A one-size label does not establish a universal fit, and model photos do not show how a skirt or headband will sit on everyone. Use the size guide alongside the exact product details. For a jewelry-led outfit, our occasion accessory guide covers necklines, sets and headpieces in more depth.
7. Connect the look and the room in three different ways
Repeat a motif
A star decoration and a star-detail skirt can create a recognizable relationship without requiring identical colors. Keep another part of the outfit simple so the motif remains easy to notice. Compare the size of the repeated shapes: an accessory seen close up and a backdrop seen from across a room play different visual roles.
Repeat a finish
A metallic decoration can relate to a rhinestone or metal-tone accessory through a shared sense of shine. They do not need to be made from the same material, and a similar finish name does not guarantee an exact color match. View the pieces together before the event and adjust the surrounding colors if they differ more than expected.
Repeat a small color accent
A color from a floral headpiece can appear in a small room detail while the larger backdrop remains neutral. This is useful when you already own most of the outfit and do not want to replace it. Choose one repeated accent first; adding every color from the headpiece can make the plan more complicated than it needs to be.
8. Check illuminated accessories before setup day
For any light-up piece, review the power source, included parts and operating instructions for the selected option. Do not assume that two accessories from the same category use the same batteries or controls. Check what arrives, test it according to its instructions and keep those instructions available for the event.
Try the illuminated item with the actual outfit and room lighting. Its effect may be subtle in a bright room and more prominent in a dimmer one. Decide whether that change suits the plan. You can choose a non-illuminated alternative if the effect distracts from the look or does not suit the setting.
Keep the product’s limitations in mind when choosing placement and use. A festive appearance does not establish outdoor suitability or water resistance. Follow the supplied guidance and the venue’s rules. If an important detail is absent, ask before making the item central to your plan rather than relying on assumptions from a styled image.
9. Create a short setup schedule
Work backward from the point when guests arrive. Separate the tasks that can be completed earlier from those that depend on the final room arrangement. Checking sizes and quantities, confirming permissions and planning the outfit should happen before setup day. Attaching decorations and taking the test photograph belong after the main furniture is in place.
| Stage | Main tasks | Decision to finish |
|---|---|---|
| Planning | Confirm the space, theme, measurements and existing supplies. | Choose the main focal area and identify what is missing. |
| Before the day | Check received quantities, try the outfit and test illuminated items. | Resolve fit, contents or operating questions. |
| Setup | Arrange furniture, install permitted decorations and test the photo view. | Adjust the layout before guests arrive. |
| After the event | Separate reusable pieces, check condition and pack by type. | Record what can be used next time. |
Leave a small amount of flexibility in the plan. If one decorative idea takes longer than expected, the event can still look complete with the main area finished. A clearly chosen focal point makes it easier to stop adding details at the right moment and spend the remaining time getting yourself ready.
10. Plan the pack-away before the party begins
Set aside suitable containers for pieces you intend to keep. Pack accessories separately from hanging decorations so chains, fastenings and strands do not become tangled together. Check the condition of each item as you take it down, and follow its instructions before cleaning or storing it.
“Reduction and reuse are the most effective ways you can save natural resources, protect the environment and save money.”
U.S. Environmental Protection Agency, Reduce Waste for Greener Holidays
This general principle is a reason to begin with what you own and keep suitable pieces for another occasion. It is not a claim that a particular Abien product has a certified environmental benefit or is recyclable. Actual reuse depends on the item’s condition and instructions. Check local options before placing unfamiliar decorative materials in recycling.
Label the container with the contents and useful dimensions. Add a photograph of the completed arrangement so you remember what the pieces looked like together. A note about the surface, fixing method and quantities can save considerable guesswork next time, especially when a successful display used several separate items.
11. Common party-planning questions
How can a small room look finished without feeling crowded?
Choose one focal area and keep the circulation routes clear. Test the view from where guests will spend time, not only from the camera position. A coherent corner, table or backdrop can establish the theme while leaving the rest of the room comfortable to use.
Should the outfit match the backdrop exactly?
No. One shared color, motif or finish can be enough. Exact matching may make some outfit details less visible in photographs, depending on the lighting and framing. Try a test picture before buying additional pieces to force a match that you may not need.
How do I know whether one pack is enough?
Compare the selected item’s dimensions and quantity with your measured plan, including overlap or drape. Do not count the panels in a styled photograph as a package specification. If you cannot determine the supplied quantity, clarify it before choosing the item.
What if a decoration does not arrive in time?
Keep a simple version of the plan that uses the space and belongings already available. Confirm current delivery estimates before ordering, but do not build the entire occasion around an assumed arrival date. A clear palette and one complete focal area can still give the gathering a considered look.
12. Finish with a guest’s-eye view
Walk into the room as a guest would. Check what you notice first, where you would put your belongings and how you would reach the main gathering area. Then try the photo spot in your finished outfit. This final pass connects the two halves of the plan: the setting people will use and the look you will actually wear.
When both feel ready, stop adding. Browse tutu skirts or leg warmers when you need a specific costume element, and use our rhinestone belt styling guide for a smaller waist accent. The strongest plan is the one you can enjoy, maintain and use with confidence throughout the occasion.